Getting a passport in India used to mean spending hours in long queues and dealing with stacks of paperwork. Those days are gone. Thanks to Passport Seva, the government’s digital initiative, you can now complete most of the process from the comfort of your home.
Whether you’re planning your first international trip or need to renew an expired document, this guide will walk you through exactly how to apply passport online in India. We’ll cover everything from understanding passport online apply documents required to mastering the passport online appointment booking process, and finally learning how to track passport application status India.
What Is Passport Seva and Why Does It Matter?
Passport Seva is the official online portal launched by the Indian government to make passport services accessible to everyone. The platform handles everything: new applications, renewals, name corrections, and address updates.
Since its launch, the system has processed millions of applications and dramatically reduced processing times. You can now apply for a passport, book appointments at your nearest Passport Seva Kendra (PSK), pay fees online, and track your application progress—all through one portal.
The service operates 24/7, which means you can start your application at midnight if that works for your schedule. No more taking time off work to visit government offices during business hours.
Key Highlights of Passport Seva Portal
The portal offers several services that make the entire process straightforward:
- Apply for a New Passport Quickly: Submit your details online without visiting any office initially. The system validates your information in real-time, reducing errors and processing delays.
- Renew Your Passport Easily: The Passport India Renewal feature lets you extend your passport validity with minimal documentation. If your old passport is still valid or expired within three years, renewal is faster than a fresh application.
- Book Appointments at Your Nearest PSK: Choose your preferred Passport Seva Kendra location and time slot based on availability. You can even reschedule if something comes up, giving you complete flexibility.
- Track Application Status in Real-Time: Get SMS and email updates at every stage. You’ll know exactly when your documents are verified, when police verification happens, and when your passport is dispatched.
- 24/7 Online Support: The helpline and online query system work round the clock. Whether you face technical issues or have questions about documentation, help is always available.
- Ideal for International Travelers and ID Updates: Whether you’re traveling abroad for work, education, or leisure, or simply need a valid government ID, Passport Seva handles all scenarios efficiently.
According to the Ministry of External Affairs, the Passport Seva initiative has reduced average processing time by nearly 50% compared to the old system.
Passport Application Fee Structure India
Before starting your application, you should know the costs involved. The fee structure varies based on the type of service and number of pages you choose.
| Service Type | Pages & Size | Validity | Fee |
| Fresh/Renewal | 36 Pages (Regular) | 10 Years | Rs. 1,500/- |
| Fresh/Renewal | 60 Pages (Jumbo) | 10 Years | Rs. 2,000/- |
| Tatkal (Fresh/Renewal) | 36 Pages (Regular) | 10 Years | Rs. 3,500/- |
| Tatkal (Fresh/Renewal) | 60 Pages (Jumbo) | 10 Years | Rs. 4,000/- |
| Minor Passport (New) | Standard | 5 Years | Rs. 1,000/- |
| Replacement (Loss/Damage) | 36 Pages (Regular) | 10 Years | Rs. 3,000/- |
| Replacement (Loss/Damage) | 60 Pages (Jumbo) | 10 Years | Rs. 3,500/- |
The 36-page booklet works fine for most people. But if you travel frequently for work, the 60-page version makes sense—you won’t need to renew as quickly when pages fill up with visa stamps.
Tatkal service costs more but delivers faster processing. It’s useful when you have an urgent trip and can’t wait for the normal timeline.
For Passport Online Apply what documents are required?
Getting your documents ready before starting the application saves time and prevents delays. Understanding exactly what passport online apply documents required are will help you prepare everything in advance.
Basic Documents for All Applicants:
Citizenship Proof: This establishes your Indian nationality. You’ll need a birth certificate issued by a municipal authority or other government body. If you were born outside India, a naturalization certificate works.
ID Proof: Any government-issued photo identification such as Aadhaar card, Voter ID, Driving License, or PAN card. These documents confirm your identity and are mandatory for verification.
Photographs: Recent passport-size photographs that meet specific requirements. The specifications include a white background, 80% face coverage, and clear features. Most photo studios know the exact passport photo requirements.
For Minors: If you’re applying for a child’s passport, you’ll need the minor’s birth certificate and copies of both parents’ passports. One parent must be present during the PSK visit with the child.
Tatkal Passport: This expedited service requires minimal documents upfront. However, police verification happens after passport issuance instead of before, which speeds up the initial processing.
Special Cases: Situations like divorce, adoption, or name change may require additional documentation. You might need affidavits or legal documents explaining the circumstances. For name changes due to marriage, carry your marriage certificate.
Proof of Address (Any One of the Following): The address proof document must clearly show your current residential address.
- Bank Passbook: Must contain your name and current address
- Water Bill: Recent bill not older than 3 months
- Voter Card: Valid Voter ID with current address
- Landline or Postpaid Mobile Bill: Recent bill showing your address
- Gas Connection Bill/Book: Valid gas connection document
- Driving License: Current driving license with address
- Aadhaar Card: Most commonly used address proof
- Income Tax Assessment Order: Recent tax assessment document
- Electricity Bill: Not older than 3 months
- Rent Agreement: Must be registered with local authorities
Proof of Identity (Any One of the Following): These documents verify who you are.
- Driving License: Valid driving license issued by RTO
- Aadhaar Card: Most widely accepted identity proof
- Voter Card: Election Commission issued voter ID
- Birth Certificate: Original birth certificate from municipality
- PAN Card: Income Tax Department issued PAN
- Photo ID Card Issued by Central/State Government: Any government department’s identity card
- Pension Card with Photograph: For retired government employees
- Any Other Government-Issued Photo ID Card: Valid government identification
The Passport Seva official documentation provides detailed information about acceptable documents for various scenarios.
How to Apply Passport Online in India Step by Step Guide
Let’s walk through the entire application process in detail. Understanding how to apply passport online step by step will help you complete your application smoothly without any confusion.
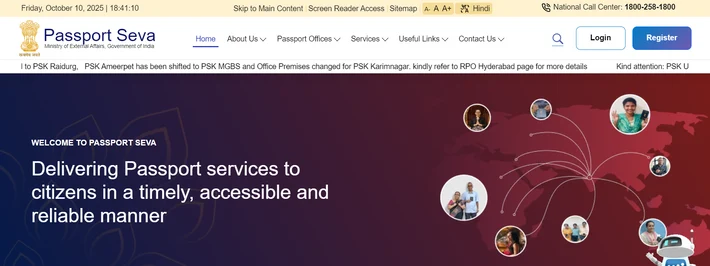
Step 1: Visit the Official Website: Open your browser and go to www.passportindia.gov.in. This is the only official portal for passport applications. Avoid third-party websites claiming to offer passport services.
Step 2: Register as a New User: Click on the “Register” button prominently displayed on the homepage. This opens the registration form where you’ll create your account.
Fill in the required fields carefully:
- Your full name (as per official documents)
- Email address or Login ID (this becomes your username)
- Password (create a strong password you’ll remember)
- Confirm password
- Security question and answer
Make sure your email address is active because you’ll receive important notifications there.
Step 3: Complete Signup and OTP Verification: After filling the registration form, click “Complete Signup”. The system sends an OTP (One-Time Password) to your registered email address.
Check your email inbox (and spam folder if needed) for the OTP. Enter this verification code on the website to activate your account. This step confirms that you own the email address and can receive official communications.
Step 4: Login and Initial Setup: After successful registration, log in using your email/login ID and password. The system asks you to select your current nearest passport office. This is important because your application will be processed through this regional office.
Choose the passport office that has jurisdiction over your current residential address. You can find your nearest office by entering your district or city name.
Step 5: Start Your Application: From the dashboard, look for the application options. Select “Apply for Fresh Passport/Re-issue of Passport” from the application type menu.
The system presents different scenarios. Choose the option that matches your situation—whether you’re applying for the first time or renewing an existing passport.
Step 6: Fill the Application Form in Detail: This is the most crucial part of how to apply passport online in India. The form has multiple sections:
Application Type Selection:
- Select “Fresh Passport” if applying for the first time
- Select “Re-issue of Passport” if renewing an expired passport
- Choose “Normal” for standard processing (3-4 weeks)
- Choose “Tatkaal” for expedited service (1-7 days after verification)
- Select “36 Pages” for regular booklet or “60 Pages” for jumbo booklet
Personal Details Section: Enter your complete name exactly as it appears on your birth certificate. Any mismatch between your application and supporting documents causes delays during verification.
Fill in your date of birth, gender, and place of birth (city, district, state). These details become permanent on your passport, so verify them carefully before proceeding.
Address Information: Enter your current residential address in the designated fields. Include house number, street name, locality, city, district, state, and PIN code. This address must match your proof of address document exactly. Even minor differences like “Street” versus “St.” or “Road” versus “Rd.” can create verification problems.
If your permanent address differs from your current address, you’ll need to provide both. Otherwise, you can simply mark “Same as present address” in the permanent address section.
Family Details: Provide your father’s name, mother’s name, and their nationalities. This information is mandatory for all applications. If your parents are also Indian passport holders, mention their passport numbers.
For married applicants, you’ll need to provide your spouse’s details as well. Select your marital status and fill in the spouse section if applicable.
Emergency Contact Information: Mention a person who can be contacted in case of emergency. This should be someone close to you—a family member or trusted friend. Provide their name, address, and phone number.
After completing each section, click “Save and Next” to move forward. The system automatically saves your progress, so you can return later if needed.
Step 7: Upload Photo and Signature: The system prompts you to upload digital copies of your photograph and signature. These must meet specific specifications:
Photograph Requirements:
- Recent color photo (taken within last 6 months)
- White or light-colored background
- Face should cover 80% of the photo area
- No glasses, caps, or other accessories
- Clear, high-resolution image
- File size: 10 KB to 200 KB
- Format: JPEG only
Signature Requirements:
- Sign on white paper with black ink
- Scan or photograph the signature clearly
- File size: 10 KB to 100 KB
- Format: JPEG only
Upload these files using the respective upload buttons. The system shows a preview after upload so you can verify if the images are clear.
Step 8: Select and Upload Documents: Now select which documents you’re submitting as proof of identity and address. The dropdown menu shows all acceptable documents listed earlier.
After selecting each document type, upload the scanned copies. Make sure scans are clear and all text is readable. Blurry or dark scans lead to rejection during verification.
For multi-page documents, you may need to merge pages into a single PDF file. Most scanning apps have this feature built-in.
Step 9: Review and Submit Application: Before final submission, the system displays all entered information for your review. This is your last chance to check for errors.
Carefully verify:
- Name spelling and date of birth
- Complete address with correct PIN code
- Parents’ names and their spellings
- Phone number and email address
- Uploaded documents are correct and clear
If everything looks good, click “Save” at the bottom of the review page. Then click “Submit” to finalize your application.
Step 10: Note Your Application Reference Number (ARN): Immediately after submission, the system generates your Application Reference Number (ARN). This is a unique identifier for your application.
IMPORTANT: Write down this ARN number immediately. Save it in multiple places—take a screenshot, write it in a notebook, save it in your phone. You’ll need this number for:
- Passport online appointment booking process
- Printing your application form
- Making fee payment
- Checking application status
- All future correspondence about your passport
Without the ARN, you cannot proceed with the appointment booking or track your application progress.
Passport Online Appointment Booking Process
After submitting your form and noting your ARN, the next critical step is the passport online appointment booking process. This determines when you’ll visit the PSK for document verification.
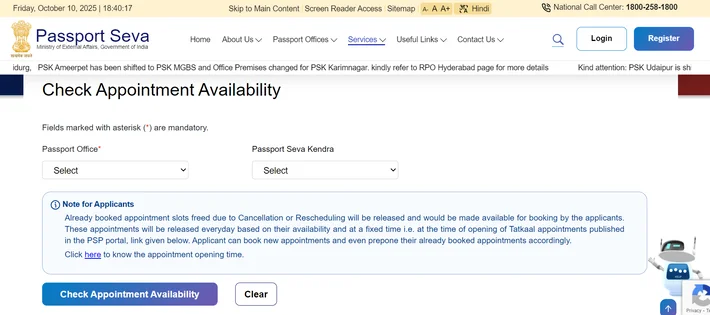
Step 11: Access the Appointment System: From your dashboard, click on “Pay and Schedule Appointment”. You’ll need to enter your ARN when prompted.
The system retrieves your application details and shows available PSK locations in your selected jurisdiction.
Step 12: Choose PSK Center and Time Slot: The appointment system displays all Passport Seva center in your area. Consider these factors when choosing:
Location Convenience: Select a PSK that’s easy to reach from your home or workplace. You’ll need to carry original documents, so pick a location where traveling is convenient.
Slot Availability: Different center have different availability. If your preferred center doesn’t have slots for the next few weeks, check nearby alternatives.
Click on your chosen PSK center. The calendar shows available dates highlighted in green. Dates in grey are fully booked or not available for booking.
Select an available “Appointment Date and Time Slot” from the calendar. Morning slots (9 AM to 12 PM) tend to get booked quickly, especially in major cities. Afternoon slots often have better availability.
After selecting your preferred slot, review the details displayed:
- PSK name and address
- Appointment date
- Time slot
- Fee amount
Step 13: Make Payment and Confirm: Click on “Make Payment” to proceed to the payment gateway. The system accepts multiple payment methods:
- Credit Card (Visa, Mastercard, RuPay)
- Debit Card (all major banks)
- Net Banking (50+ banks supported)
- UPI (Google Pay, PhonePe, Paytm, etc.)
Choose your preferred payment method and complete the transaction securely. The payment gateway is encrypted and follows banking security standards.
Once payment is successful, your appointment is confirmed. The system displays a confirmation message with your appointment details.
Step 14: Print the ARN Receipt: After payment confirmation, you’ll see an option to print your ARN receipt. This document contains:
- Your Application Reference Number
- Applicant name and photo
- PSK address
- Appointment date and time
- Payment confirmation
CRITICAL: Print this ARN receipt and carry it when visiting the PSK. Without this receipt, you may not be allowed entry to the center. If you don’t have a printer at home, save the PDF and get it printed at any cyber cafe or printing shop.
You’ll also receive an email confirmation with the same details. Save this email for your records.
Visit PSK/RPO and Biometric Appointment
On your appointment day, here’s what happens at the Passport Seva Kendra:
Arrive Early: Reach the PSK at least 15 minutes before your scheduled time. This gives you time to find parking, go through security, and locate the right counter without rushing.
Security Check: Entry to PSK involves security screening similar to airports. Your bags will be scanned, and you’ll pass through a metal detector. Electronic devices like phones are usually allowed but may need to be switched off inside.
Document Verification: Present your printed ARN receipt at the reception. You’ll be assigned a token number and directed to the document verification counter.
At the verification counter, an officer checks your original documents against the uploaded copies in your application. They verify:
- All documents are genuine and unaltered
- Details match across different documents
- Photographs meet specifications
- No discrepancies in name, date of birth, or address
The officer may ask clarifying questions if something needs explanation. Answer clearly and provide any additional information requested. All original documents are returned to you after verification.
Biometric Scan: After document verification, you move to the biometrics counter. Here, they capture:
- Fingerprints of all ten fingers
- Digital photograph (even though you uploaded one earlier)
- Digital signature (you’ll sign on an electronic pad)
This biometric data becomes part of your passport record and helps in identity verification at immigration counters worldwide.
Pay Additional Fees (If Required): In rare cases, you might need to pay additional fees for specific services. The counter staff will inform you if this applies to your case.
Get Receipt: Before leaving, you receive a receipt showing your ARN and current processing status. This receipt confirms that your PSK visit is complete and your application has moved to the next stage.
The entire PSK visit typically takes 30-60 minutes depending on crowd levels. Your cooperation and having all documents ready helps speed up the process.
Police Verification Stage
After your PSK visit, your application enters the police verification phase. This is a standard procedure for all passport applications.
How It Works: Your local police station receives your application details. A police officer is assigned to verify your residential address and background.
The Visit: The officer will visit your address mentioned in the application. They may call ahead to schedule a convenient time, or they might show up during business hours without prior notice.
What They Check: The verification confirms:
- You actually reside at the stated address
- Your address details match municipal records
- There are no criminal cases or security concerns
- Your neighbors can confirm your identity if needed
Be Available: Make sure someone is at home during typical working hours (10 AM to 5 PM on weekdays). If you work during these hours, inform a family member or roommate about the expected verification.
Duration: The actual verification meeting takes 15-30 minutes. The officer asks basic questions about your residence, occupation, reason for applying for a passport, and travel plans.
After Verification: Once the local police station completes verification, they submit their report to the Regional Passport Office. This usually takes 1-3 weeks depending on the workload at your local station.
You’ll receive an SMS notification once police verification is complete and your application moves to the approval stage.
Track Passport Application Status India
Knowing how to track passport application status India helps you stay informed about your application progress. The Passport Seva portal provides real-time tracking.
Access the Tracking System:
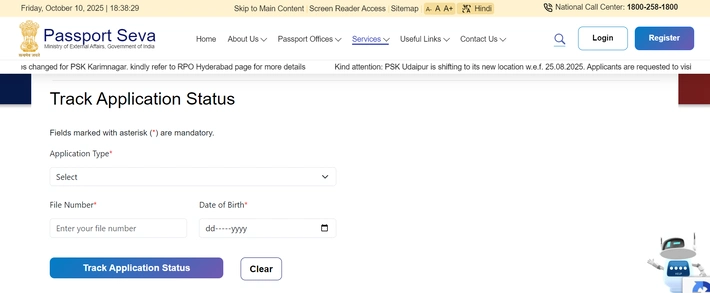
Visit the Passport Seva website and look for the “Track Your Application Status” option on the homepage. Click on it to open the tracking page.
Enter Your Details:
The system asks for either:
- ARN (Application Reference Number) + Date of Birth, OR
- File Number + Date of Birth
Most applicants use the ARN since it’s available immediately after submission. The File Number is generated later during processing and appears on your ARN receipt.
Enter your ARN in the first field and your date of birth in DD/MM/YYYY format. Click “Track Status” to view your application progress.
Understanding Status Updates:
The tracking page shows your current status with detailed information. Here are the stages you’ll see:
Application Received: Your online form has been submitted successfully and accepted by the system. The application is now in the processing queue.
Under Police Verification: The police verification process has begun. Your local police station has received your details and will schedule the address verification visit soon.
Police Verification—Passed: The police have completed address verification and submitted their report. Your application is clear for final processing.
Application Approved: The Regional Passport Office has reviewed everything and approved your passport. It’s now ready for printing.
Printed: Your physical passport booklet has been printed with your details and photograph. It will be dispatched within 1-2 days.
Dispatched: Your passport has been handed over to India Post or Speed Post for delivery. The tracking page shows the consignment number which you can use to track delivery on the India Post website.
SMS and Email Notifications:
You don’t need to constantly check the portal. The system automatically sends updates to your registered mobile number and email address at each stage.
These notifications include:
- Confirmation of application submission
- Appointment confirmation
- PSK visit completion
- Police verification initiation
- Police verification completion
- Passport approval
- Dispatch notification with tracking number
Processing Timeline:
For normal applications, the typical timeline is:
- PSK visit: Within 1 week of application submission (based on your chosen appointment)
- Police verification: 1-3 weeks after PSK visit
- Approval and printing: 2-5 days after police clearance
- Dispatch and delivery: 3-5 days after dispatch
Total time: Approximately 3-4 weeks from application submission to delivery.
For Tatkal applications, the process is faster:
- Same PSK visit timeline
- Police verification happens after passport issuance
- Approval and printing: 1-2 days after PSK visit (if all documents are in order)
- Dispatch: Immediate after printing
Total time: 1-7 working days from application submission to delivery (before police verification).
If you notice your application is stuck at any stage for an unusually long time, you can contact the Passport Seva helpline or visit the PSK with your ARN receipt for assistance.
Important Information and Guidelines
Please read the complete official guidelines before applying for any services. Below are the necessary hyperlinks to related resources:
The necessary hyperlinks to related articles are as follows
- Passport Online Apply Now
- Check Appointment Availability
- Track Passport Application Status
- View List of Required Documents
- National Call Centre – 1800-258-1800 (Toll-Free)
- mPassport Seva App Download from Google Play Store || Apple App Store
- Passport Seva Official Website www.passportindia.gov.in
Join the Rojgar Sangam community for updates:
For any questions, contact us at: support@rojgarsangam.in
⚠️ Disclaimer: Information is sourced from official government websites including www.passportindia.gov.in and Ministry of External Affairs. For any discrepancies or updates, please refer to official sources. The author and website are not responsible for any changes in procedures or fees.


i just apply successfully for passport with the help of this Article thank you sir wese bhi hum indians mashoor hai best tutorial vidoes banane ke liye
Thanks for your appreciation